DIY DISTRESSED SIGN tutorial
CRAFTS | DIY | FALL DECOR | HOLIDAYS | HOME DECOR | Projects | TUTORIAL

Hello Everyone!
Lately it seems like I put a post up almost every day..ha
I just really have a lots of going on with fall decorations and I want you to see all that:-)
As you know, I am working on redecorating our
DINING ROOM
for fall.
Today’s tutorial is a part of the dining room decoration project as well.
I wanted to have a big distressed sign in the dining room, so I made actually 2 medium sized
DISTRESSED SIGN
I ♥ THEM
…
Here is what you need:
-wood panel { I used pine wood panel, size 1×12 -long as you need }
– your choice of paint for the base
-your choice of paint for the top
– vinyl letters or stencil
-sand paper

TUTORIAL:
1. Paint your wood for the base color that will shine through the top color once the top color sanded down.
2.Once the paint dried ,place your vinyl letters on the painted wood
{ I used my cutting machine to cut out my vinyl letters }
You can also use stencil for this project if you don’t have access to a cutting machine.

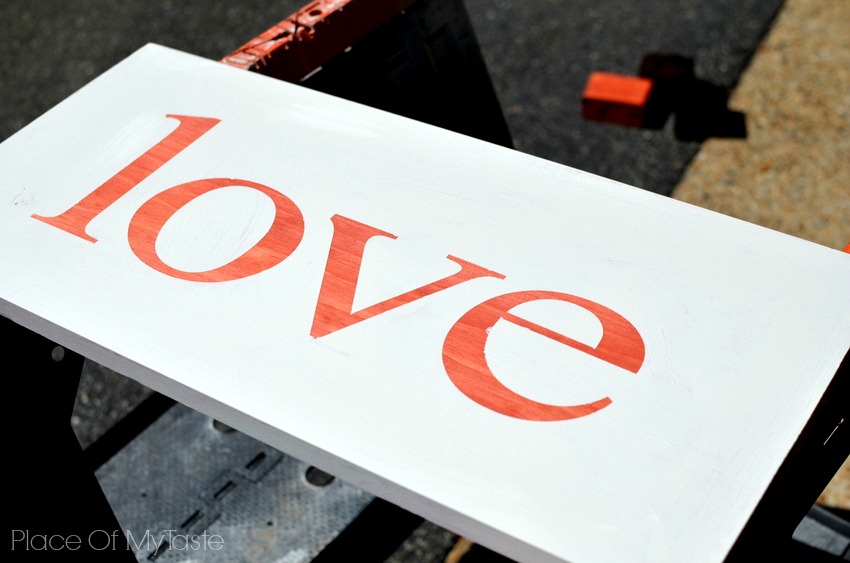
3. Paint the main color of the wood sign on the top of the attached letters.
I used my off white paint.

4. Peel of the letters before the top paint completely dry.
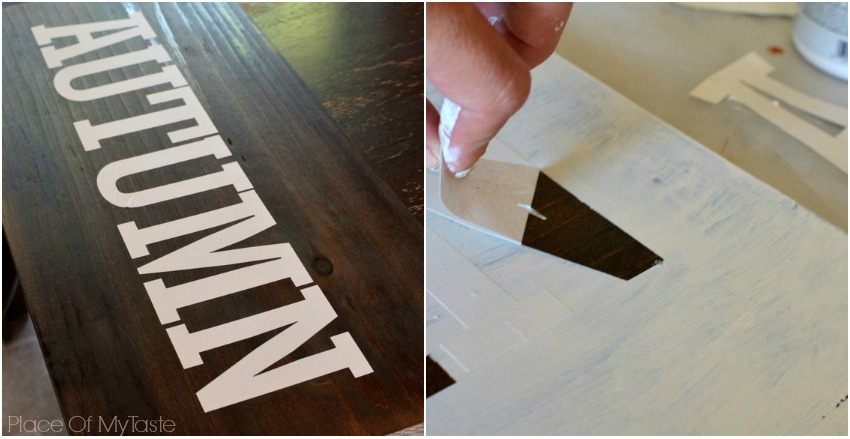
6. This is what you should have your wood panel look like after you peeled off the vinyl letters.
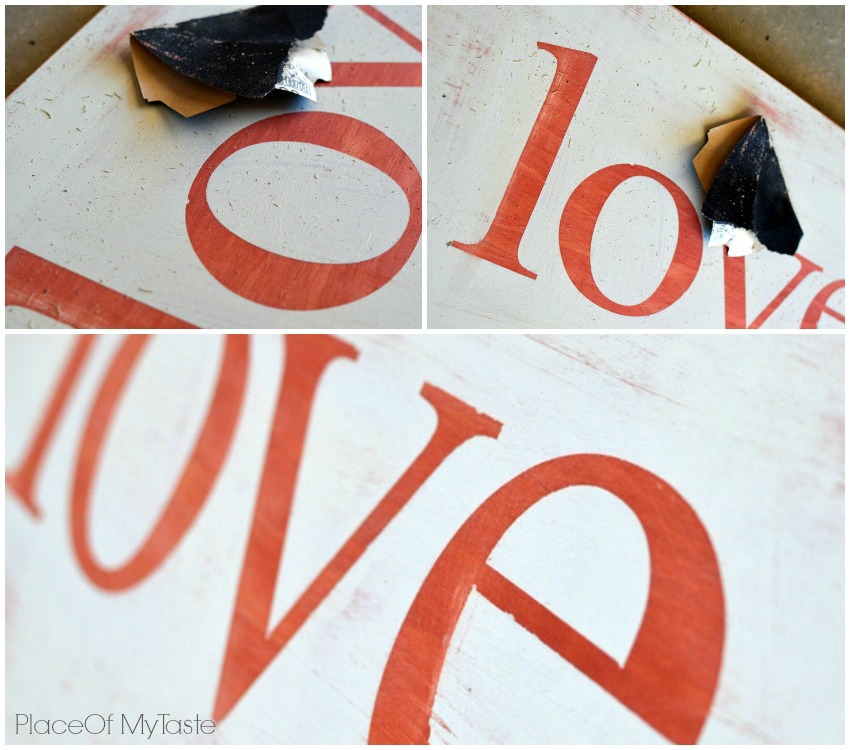
7. Now you can start sanding your wood.
Make sure you sand the edges well so you will get the desired distressed look.
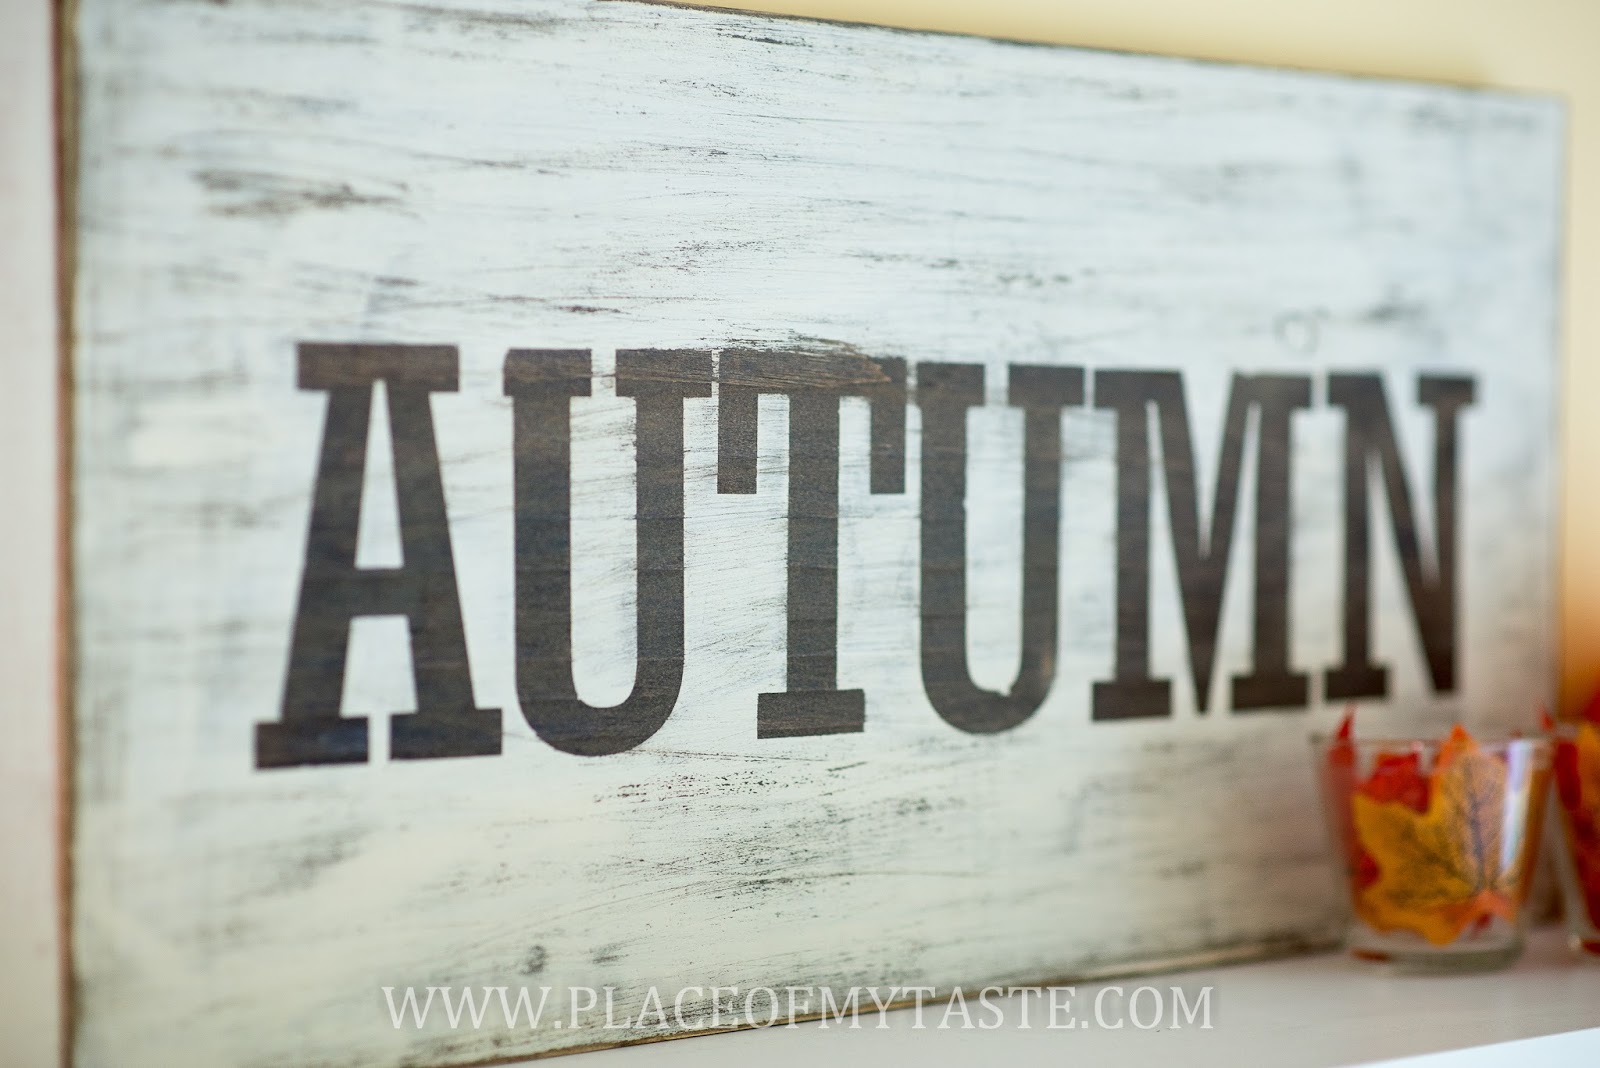
…and here are my finished distressed signs…
-4.jpg)
-3.jpg)
These signs not only smile back at me in my dining room
but I can use them as photography props for my photography sessions.
…Here is how…
♥ Sweet ♥
+copy.jpg)
I hope you got inspired to create your own distressed sign!
Thanks for stopping by!
Make sure you visit back tomorrow to see my fall dining room!


I love these!! I have a huge obsession right now with pallets so I will be pinning!!
Stopping by from Homemade by You… You can find me over at http://fromgatetoplate.com. I would love for you to stop by!
Thanks! 🙂
I love autumn too and me thinks I need a sign like this to declare it! Our weekly Super Saturday Link Party is live. We would love to have you join us with any of your great ideas. It would make us so happy to have you on board. http://www.madefrompinterest.net/2013/10/super-saturday-link-party-14/
So cute! Fab tutorial…love the distressed washed look of the top coat!
I LOVE this idea! I did not know how to get the distressed look but now I totally do. I am going to try this. I love these little signs but prefer them to look like this instead of perfectly clean.
I did have a question though, how do you peel the letters off without messing up the paint?
If you have time you should try and link up at
Gorgeous!! They look fantastic!!